The latest version of this file can be found at:
http://support.atmail.com/
@Mail PHP Webmail ( Client-mode ) Source Installation and Configuration Guide
 1. @Mail WebMail Client introduction and the installation script
This document will explain how to install your @Mail WebMail Client software utilizing it's simple, web-based, installation script. The @Mail WebMail Client should be installed when you with to use @Mail's WebMail software with your existing mail services.
NOTE: You must have an existing POP3 and/or IMAP server, and an existing SMTP server to run the WebMail Client software.
If you wish to setup @Mail as a complete mail server, please refer to the Server installation guide.
1.0 Before you install: requirements and dependencies
@Mail requires the following software:- MySQL Libraries - http://www.mysql.com/
- Apache Webserver - Usually installed by default with most Linux
Distributions and Unix Variants - http://httpd.apache.org/
- PHP 4.X or newer - http://www.php.net/
- PHP MySQL support - http://us2.php.net/mysql
- Mail Parse extension - PECL :: Package :: mailparse. http://pecl.php.net(For Red Hat based systems you can use the php-pecl-mailparse package found in the DAG repository.)
- Set Max Filesize Upload PHP variable to 16MB or higher - Set the php.ini variable upload_max_filesize to larger than 16MB (higher for larger attachment support). Usually php.ini is located at /etc/php.ini. You will need to restart the web server to enable this change.
We strongly recommend using the Redhat Package Manager for RPM compatible systems ( Redhat, Fedora, Mandrake ) as this can help identify missing dependencies and automatically setup the software for your selected platform.
2 InstallationOnce you have installed any required software, you may proceed to installing @Mail WebMail Client on your web server!
2.0 Download and extract @Mail WebMail Client
Next you must place the @Mail WebMail Client files on your web server.
- 2.0.0 SSH web server access
Download the @Mail archive and extract it.
tar zxf atmailphp5.tgz -C /tmp
Move the webmail directory under your web server's DocumentRoot, or VirtualHost directory (these can be found in your apache configuration file. Here is a rough guide to a few distribution defaults:
- Red Hat based distributions : /var/www/html(default user is apache)
- SUSE based distributions : /srv/www/htdocs(default user is wwwrun)
- Debian based distributions : /var/www/apache2-default(default user is www-data)
mv /tmp/atmailphp5/webmail/ /path/to/document/root
Next, change the ownership of the directory to the web server user. This is required for @Mail to save configuration files via the web and used during the install process. For example:
chown -R apache /path/to/documntroot/webmail/
- 2.0.1 FTP web server access
Extract the @Mail archive onto your local machine, then FTP the entire webmail directory to your server's DocumentRoot or VirtualHost directory.
You are now ready to access your website and begin the installation process.
Point your browser to your webserver http://yourdomain.com/webmail (replace yourdomain.com with your actual domain)
This will bring up the installation wizard screen:
Note:
Please ensure that /var/www/html/webmail is writable by webserver user. See the installation documentation for the complete tutorial on installing @Mail This is caused when the directory of @Mail is not owned by the web server user, which is required for the installer to be able to save the global configuration file.
To change the permissions run on the command-line:
chown -R [webserveruser] /var/www/html/webmail
Where [webserveruser] is the user which runs Apache ( Generally user apache, nobody or www )
You can try to find out the correct user that your web server runs under with one of these commands:
ps auxw | grep httpd
# or
ps auxw | grep apache
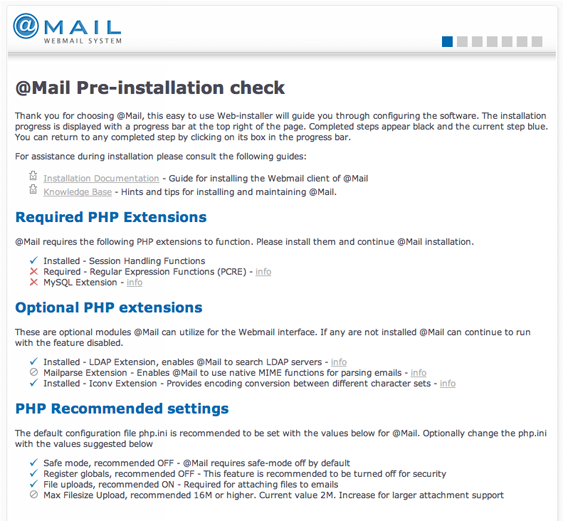
2.1.0 @Mail Pre-installation check
At the @Mail Pre-installation check screen, you will be shown information any problems with needed server software and PHP settings. You may end up needing to make some changes to your /etc/php.ini file, or find that you need to install various software dependencies.
When you are ready, select Continue to proceed with the installation.
2.1.1 Select Language and License
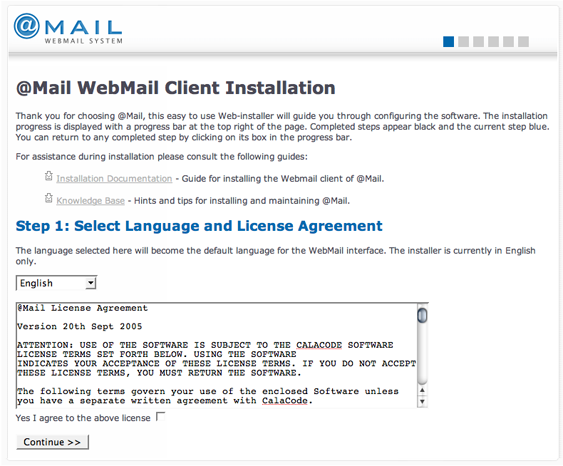
Please select a default language and read through the license agreement. Select Yes I agree to the above license and Continue once you are happy with the license agreement and language.
Next, select the Mysql database details.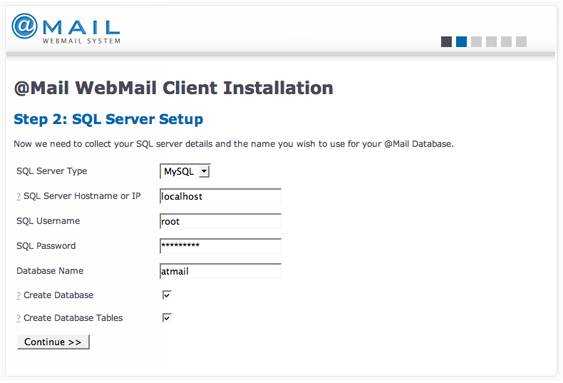
If possible use a non-privileged mysql account, not the default root user. The default database name is atmail. If this is a new installation, you should see check boxes that allow you to create the @Mail database and it's tables.
NOTE: If you are re-installing @Mail with an existing database make sure to remove any check mark in the database creation options.
Select Continue when you are ready to proceed.
2.1.2.0 Troubleshooting
If you have PHP installed, but without the Mysql database extensions, the installer will alert these are missing. To proceed you must install the PHP mysql extension, for example using Fedora run:
root# yum install php-mysql
Once installed, restart Apache for changes to take effect
service httpd restart
Then refresh the installer page to continue with the mysql installation.
If you receive the error message
=Can't connect to local MySQL server through socket '/var/lib/mysql/mysql.sock', make sure mysql is installed and running on the localhost or specified server.If running RH Fedora, you can validate the mysql-server is installed by running:
yum install mysql-server
Then start the service:
service mysqld start
2.1.3 SMTP and Admin Email Configuration
Next, you must define the SMTP hostname for Webmail to send outgoing messages. By default the localhost SMTP server is used, you may need to define another SMTP server if one is not running on the local server.
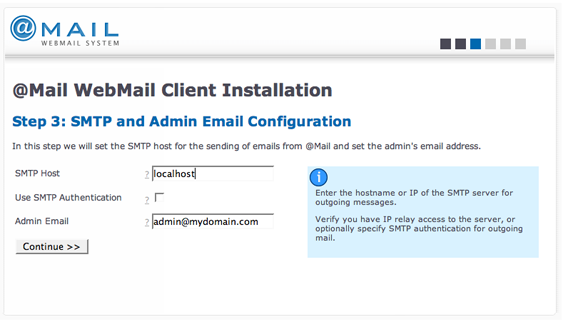
Make sure you have access to relay messages via the SMTP server and that the IP address of your server is allowed to send messages.
Next, define the administrative email-address, this address will be used in the WebMail interface to notify end users of who to contact for support.
Select Continue when you are ready to proceed.
If you receive the error message 'Could not connect to the specified SMTP server', verify the SMTP hostname is correct, and you have access to relay messages.
2.1.4 Register software license
You must register your copy of @Mail. Please follow the links to generate a new serial key so as to most accurately reflect this installation.
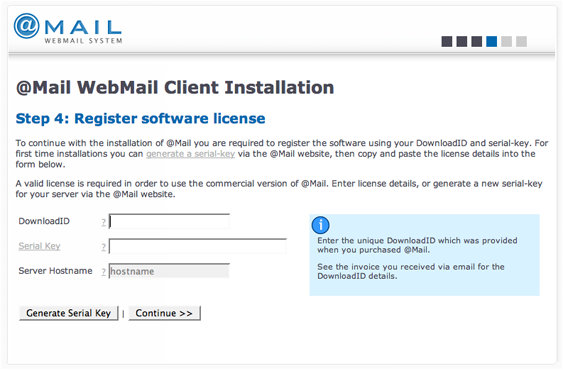
Select Continue when you are ready to proceed.
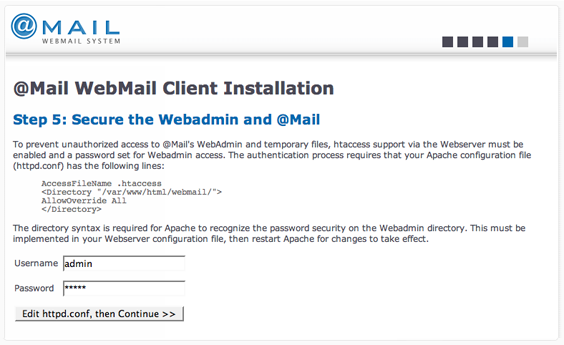
2.1.5 Secure the Webadmin and @Mail
@Mail includes an administration panel which is used to control users, modify system settings, view logs and run system maintenance tasks. You should specify the username and password you wish to use for the WebAdmin panel. The installer will create an Apache .htaccess file to password-protect the directory.
NOTE: You may not need to insert the line that starts with AccessFileName if this setting is already present in your Apache configuration.
NOTE: Most hosted sites already have the AccessFileName and AllowOverride parameters set correctly. If you do not have access to the Apache server configuration, you can just continue, and check after the installation that you do receive a password prompt when accessing webadmin. If you do not receive a password prompt, you should contact your hosting provider to adjust these settings for you.
If possible/necessary, edit your httpd.conf (or appropriate .conf file for Apache) and insert these lines:
AccessFileName .htaccess
<Directory "/var/www/html/webmail/">
    AllowOverride All
</Directory>
</pre>
If you made changes to Apache configuration, you will need to restart the service. For most systems, one of the following lines will work:
/etc/init.d/httpd restart
/etc/init.d/apache restart
/etc/init.d/apache2 restart
When you are sure that .htaccess files will work properly on your web server, select Edit httpd.conf, then Continue.
If you forget or lose the password for the @Mail WebAdmin, you can remove the file /path/to/atmail/webadmin/.htaccess. Removing this file will remove the WebAdmin password prompt. Next, access the Webadmin > Security > Admin password to specify the new password
Once complete @Mail will create a configuration file (/path/to/webmail/libs/Atmail/Config.php) based on the information you provided during the installation.
You can optionally edit the configuration file manually if you want to define settings, or preferrably use the inbuilt Webadmin panel:
http://url.com/atmail/webadmin/
- Once logging into Webmail, if you receive the error "DB Error: no such database" - Verfiy that you have successfully defined the correct mysql details in the installer.
To reset the installation wizard and start from scratch, edit the configuration file
/path/to/webmail/libs/Atmail/Config.php
And remove the
'installed' => 0
line.Next remove the /path/to/webmail/install/.htaccess file, and reload the @Mail URL to continue installation from the beginning again.
If you receive the error message when loading Webmail:
Warning: fopen(html/english/login.html): failed to open stream: No such file or directory in /var/www/html/phpport/atmailphp/webmail/libs/Atmail/Global_Base.php on line 205 cant open html/english/login.html
This is due to the HTML templates for the specified language not been built. To enable run the following command via the command-line:
cd /path/to/atmail/ ; php lang.php english lang/languages/english/english.lang
Where english is the language from the error message above
For additional support, please visit our web site http://atmail.com/ - Or send us an Email : support@CalaCode.com